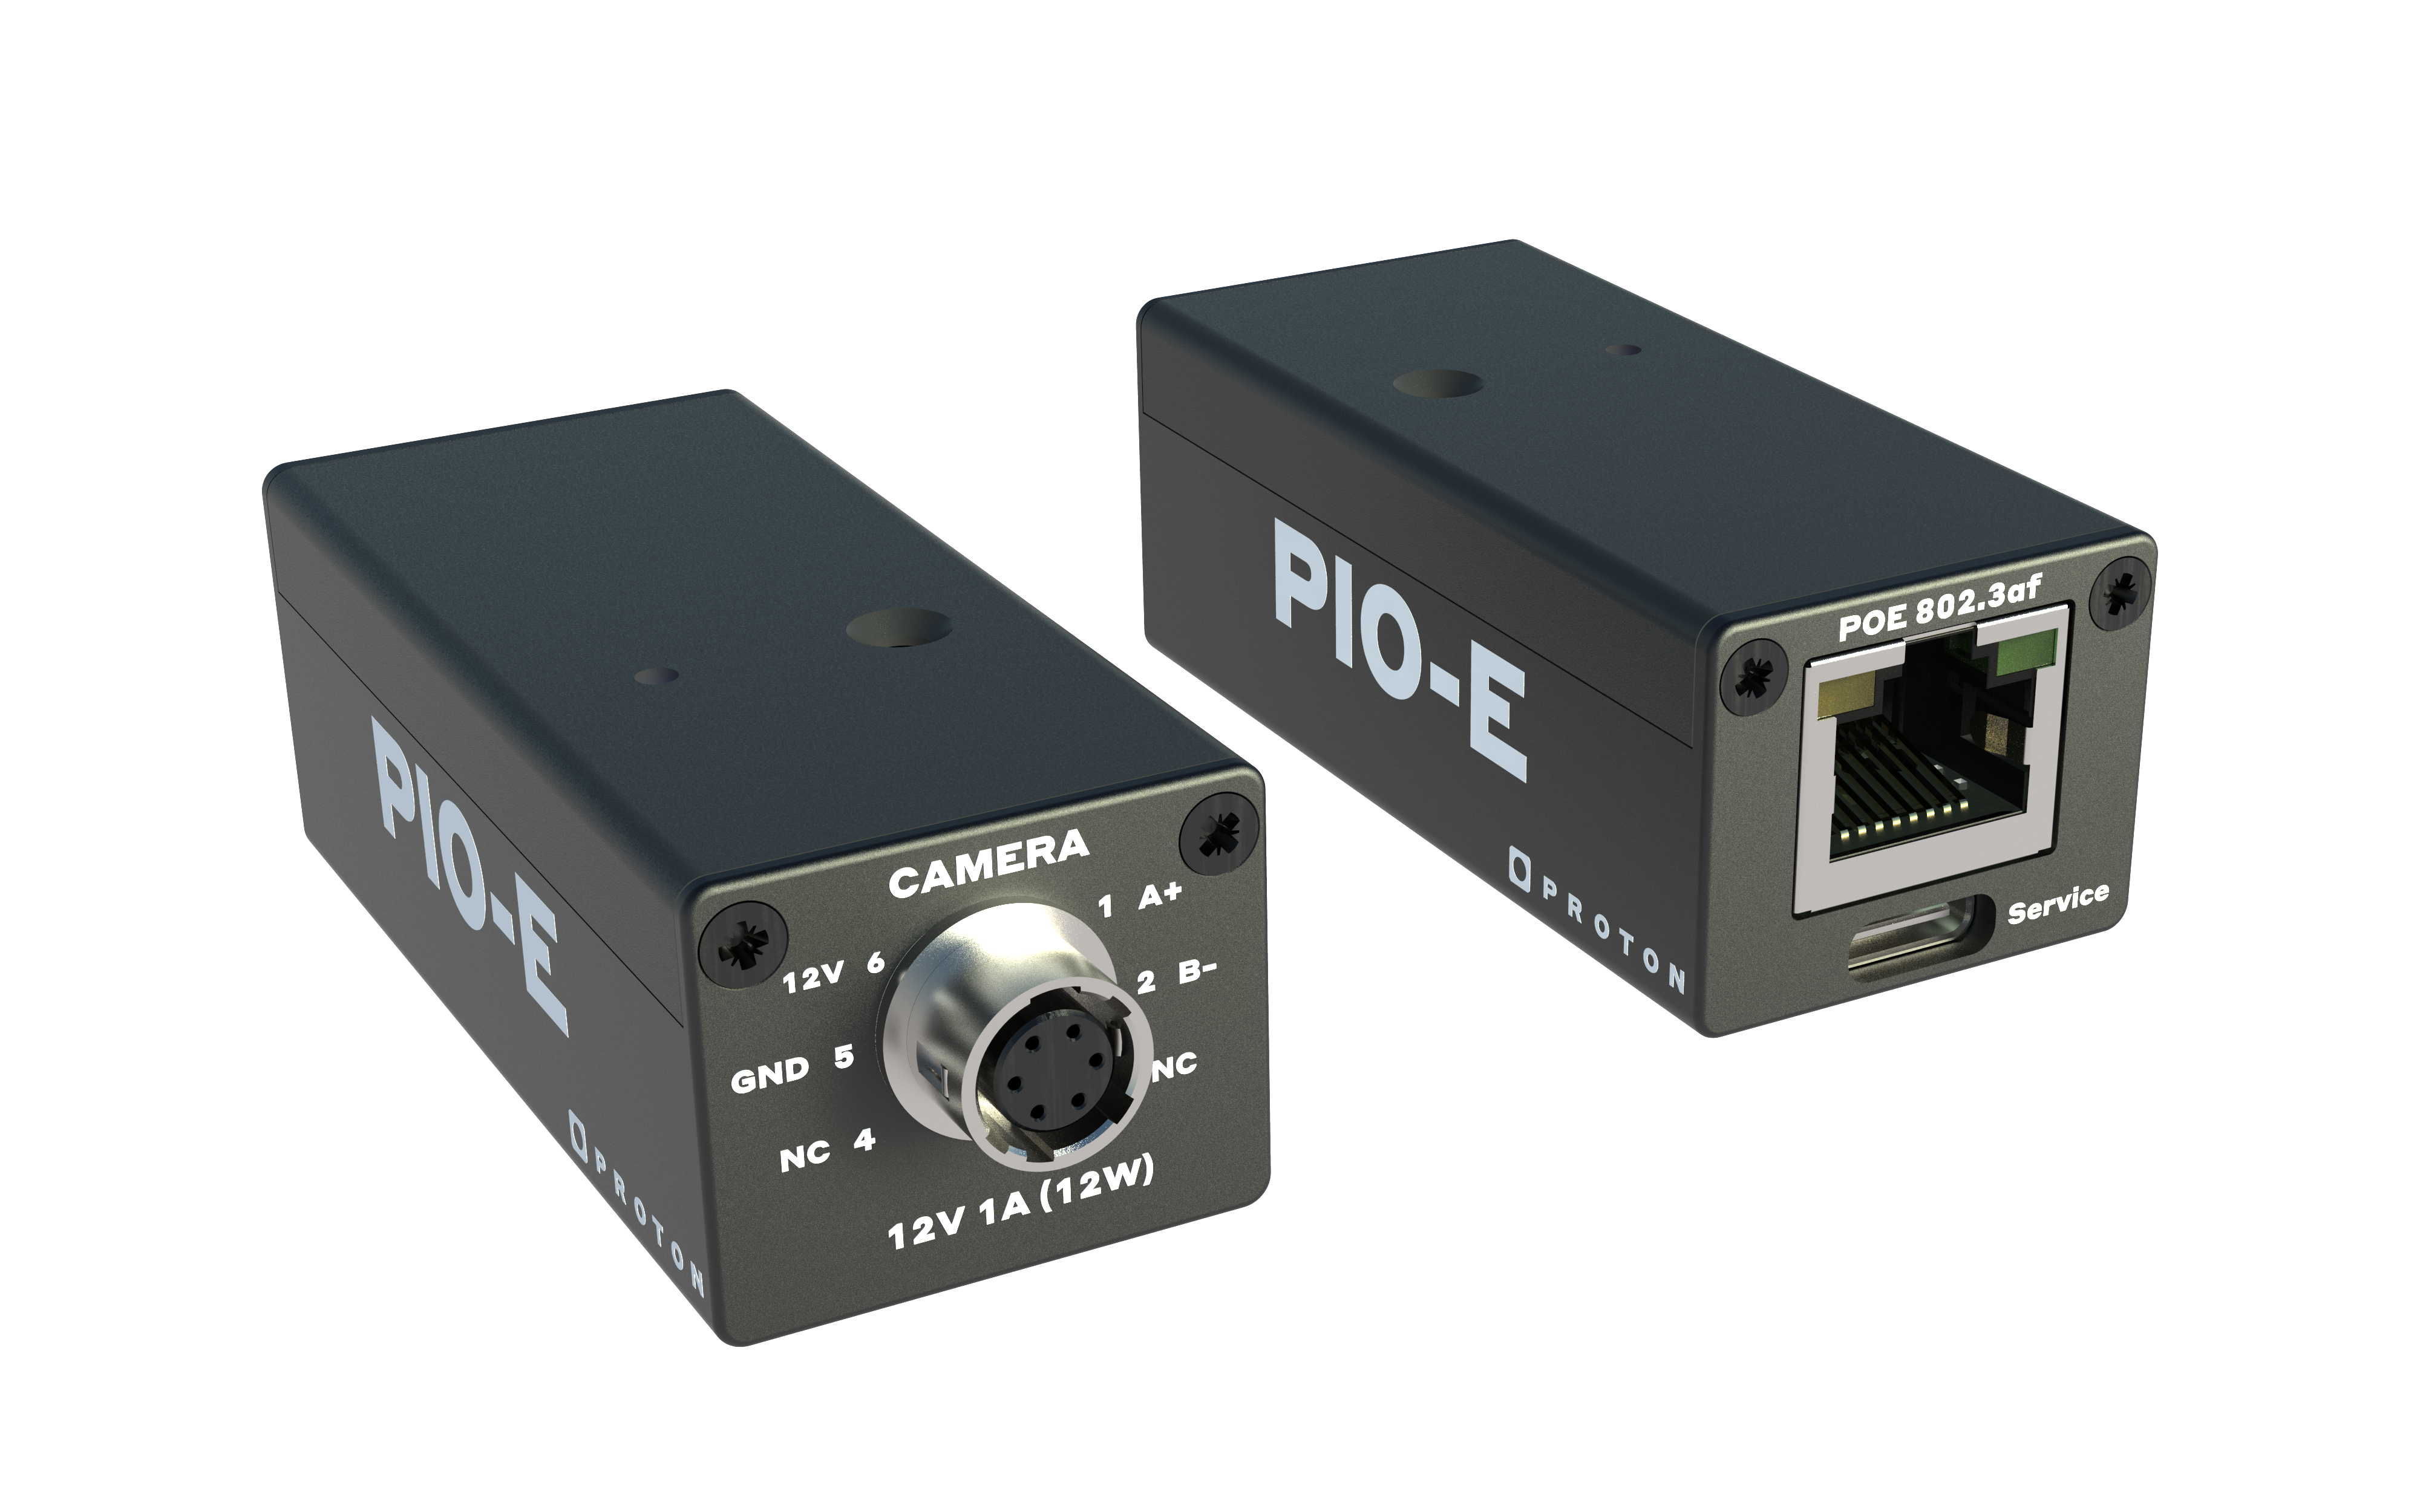
PIO-E (PoE)
| Size | 60mmx22mmx27mm |
| Weight | 43g |
| Computer | Ethernet |
| External PSU | PoE (802.3af) |
| Power delivery | 12V 1A (12W) |
| Camera: | Hirose 6P |
USB-C is only used to setup your PIO-E (Networking, Upgrades, etc.)
Not compatible with HFR because PIO-E only delivers 12W, while the HFR needs 15W.
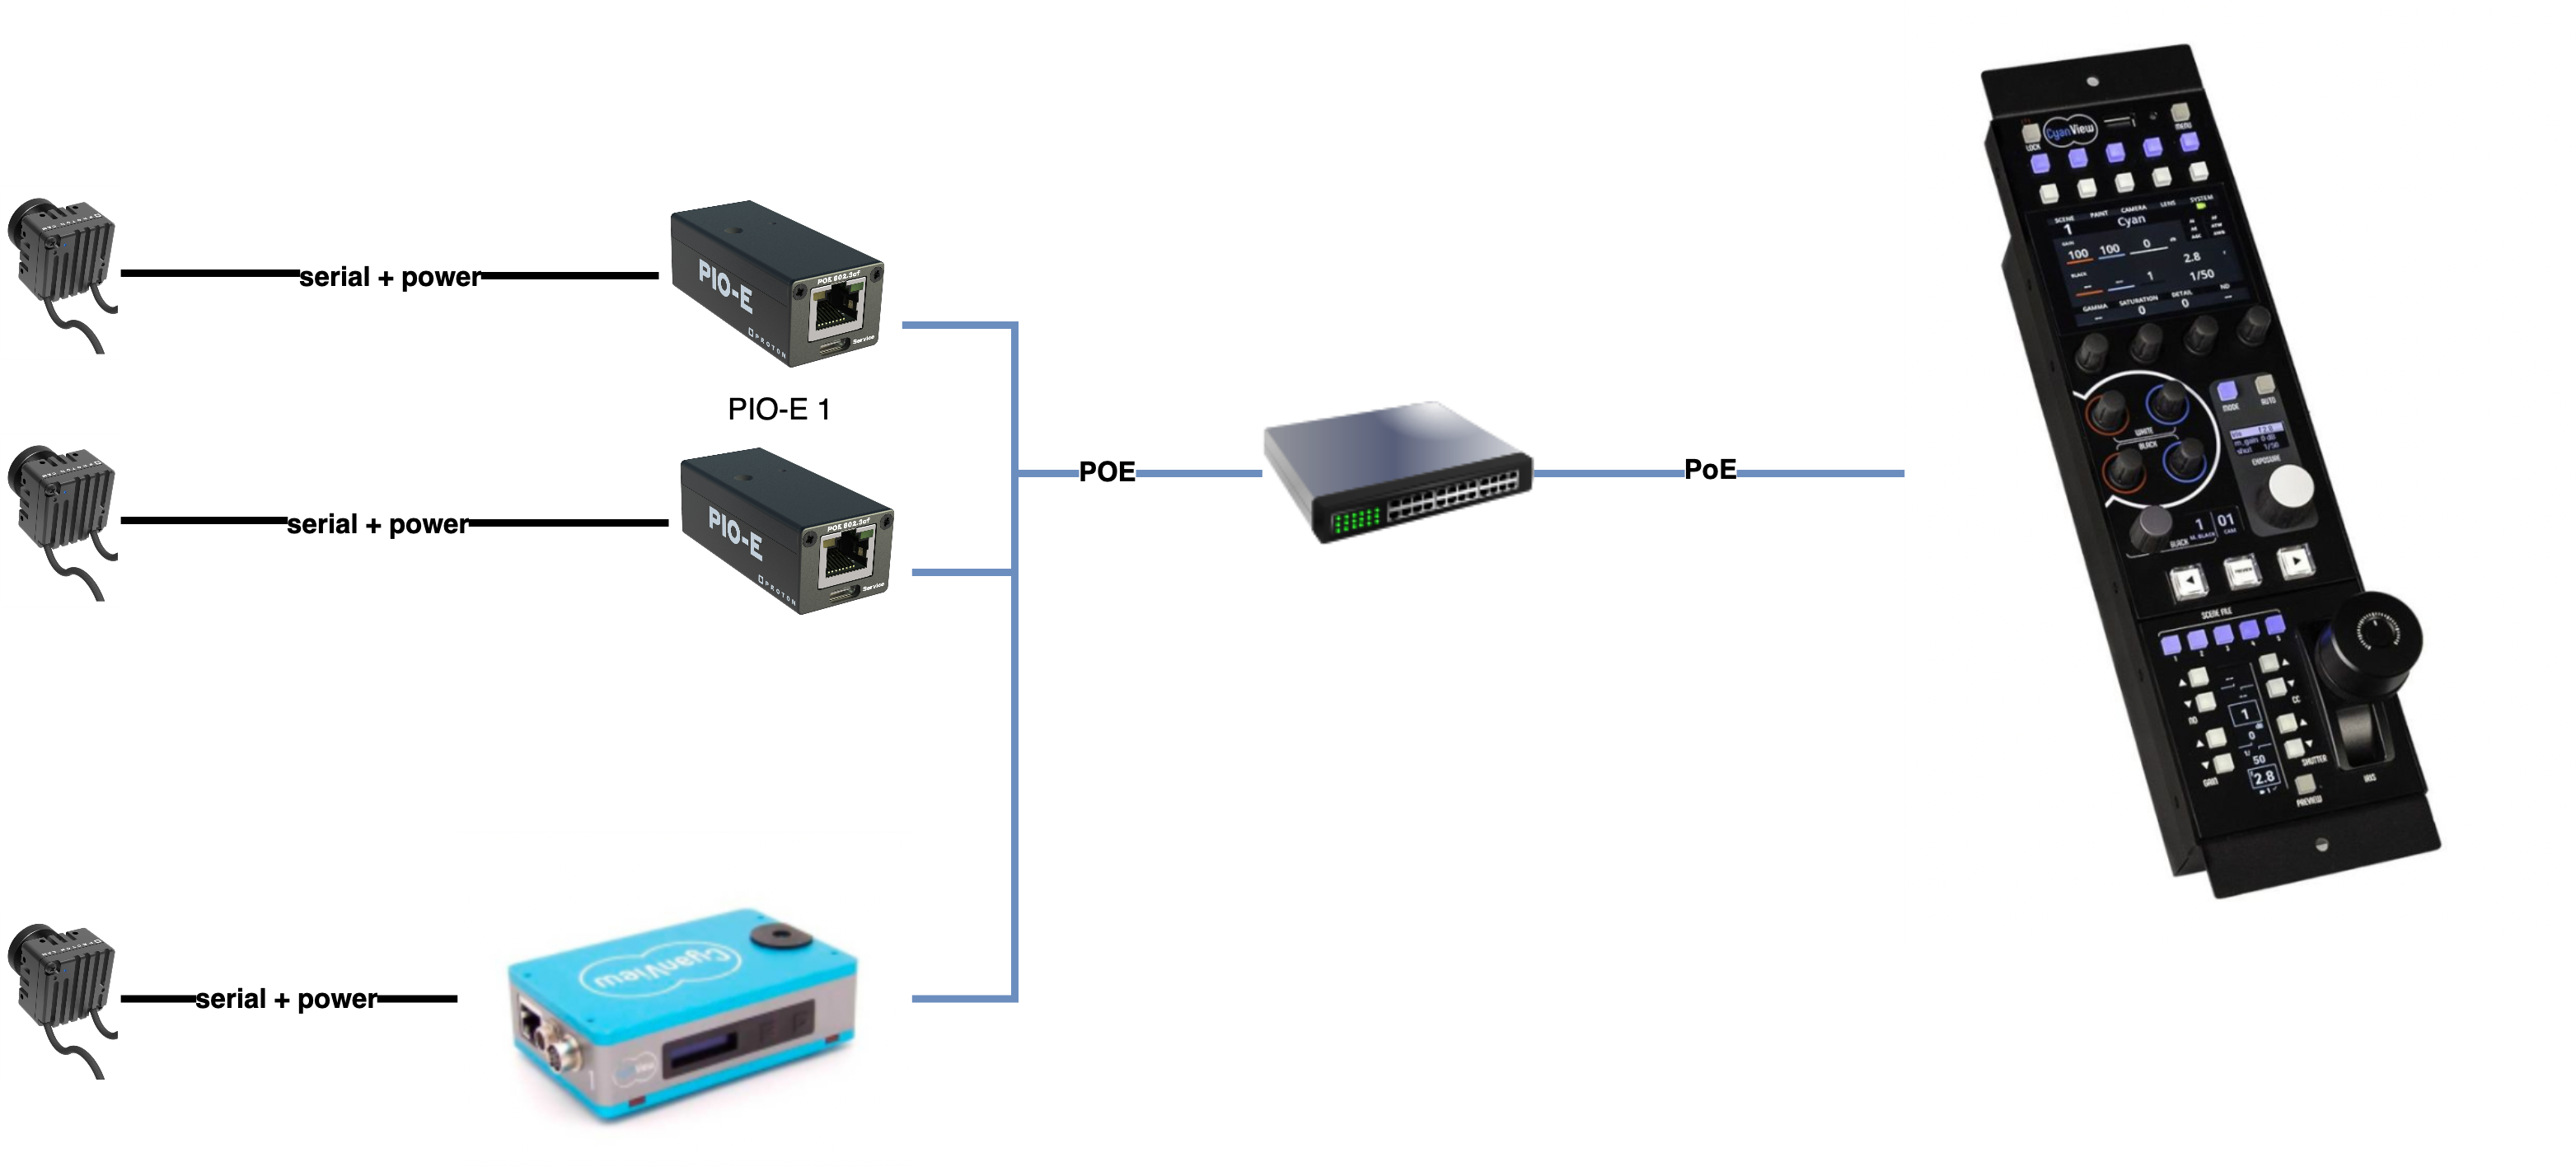
Wiring
Proton Control Software

Cyanview RCP
You can find more information here
You can continue to use the Cyanview CI0/RIO. The PIO-E is only compatible with Proton camera (you cannot use other serial cameras with it). But works perfectly fine with our software and Cyanview RCP.
Rule of thumb:
- If you're planning to control various cameras type with cyanview, stick with their CI0
- For HFR, as our PIO-E is 12W only, use CI0 with external power supply
- For everything else: use our PIO-E, it's small, cheap and IP (easy setup, easy scaling)
Pay attention that the PIO-E only accepts a single IP connection at a time. So once linked with a RCP, make sur to temporarily disable the RCP camera from the Cyanview UI to be able to use Proton Pontrol Software.
Introduction
Proton camera PoE interface.
Usages:
- Updating the camera
- Changing parameters from your computer
Spelling (NATO):
- P like Papa
- I like India
- O like Oscar
- E like Echo
Pronounced: Pee - Eye - Oh - E
This is a connecting box for Proton all cameras (except HFR).
Reference: PCI-ACC-PIO-E
Infos
Inputs: PoE Ethernet
Output: 6P Hirose to the camera
The USB-C is only to configure or update your PIO-E, not to control/power your camera.
LED
The PIO-E has a single LED on top.
| BLUE (blink) | All good (DHCP mode) |
| PURPLE (blinking) | All good (STATIC mode) |
| GREEN (blink) | All good and used/connected (App or RCP) |
| RED (steady) | Button pressed |
| RED/WHITE (blinking) | INTERNAL usage |
| OFF | Check your cable and switch and make sure it's PoE |
Button
The PIO-E has a single button on top.
Long press (8 seconds) to do a factory reset:
- LED will be steady RED when the button is pressed, keep pressing
- When the LED blinks RED and White, keep pressing
- When the LED is steady RED again, release
- PIO-E restarts with it's factory settings (DHCP, etc.)
You could also use the USB-C plugged to your computer to check/change/reset any parameter of your PIO-E.
Proton Control Software
DHCP (default)
Simply connect your laptop and PIO-E's on the same network. PIO-E will be powered by your PoE switch.
Open the Proton Control Software and click on "Find Devices":
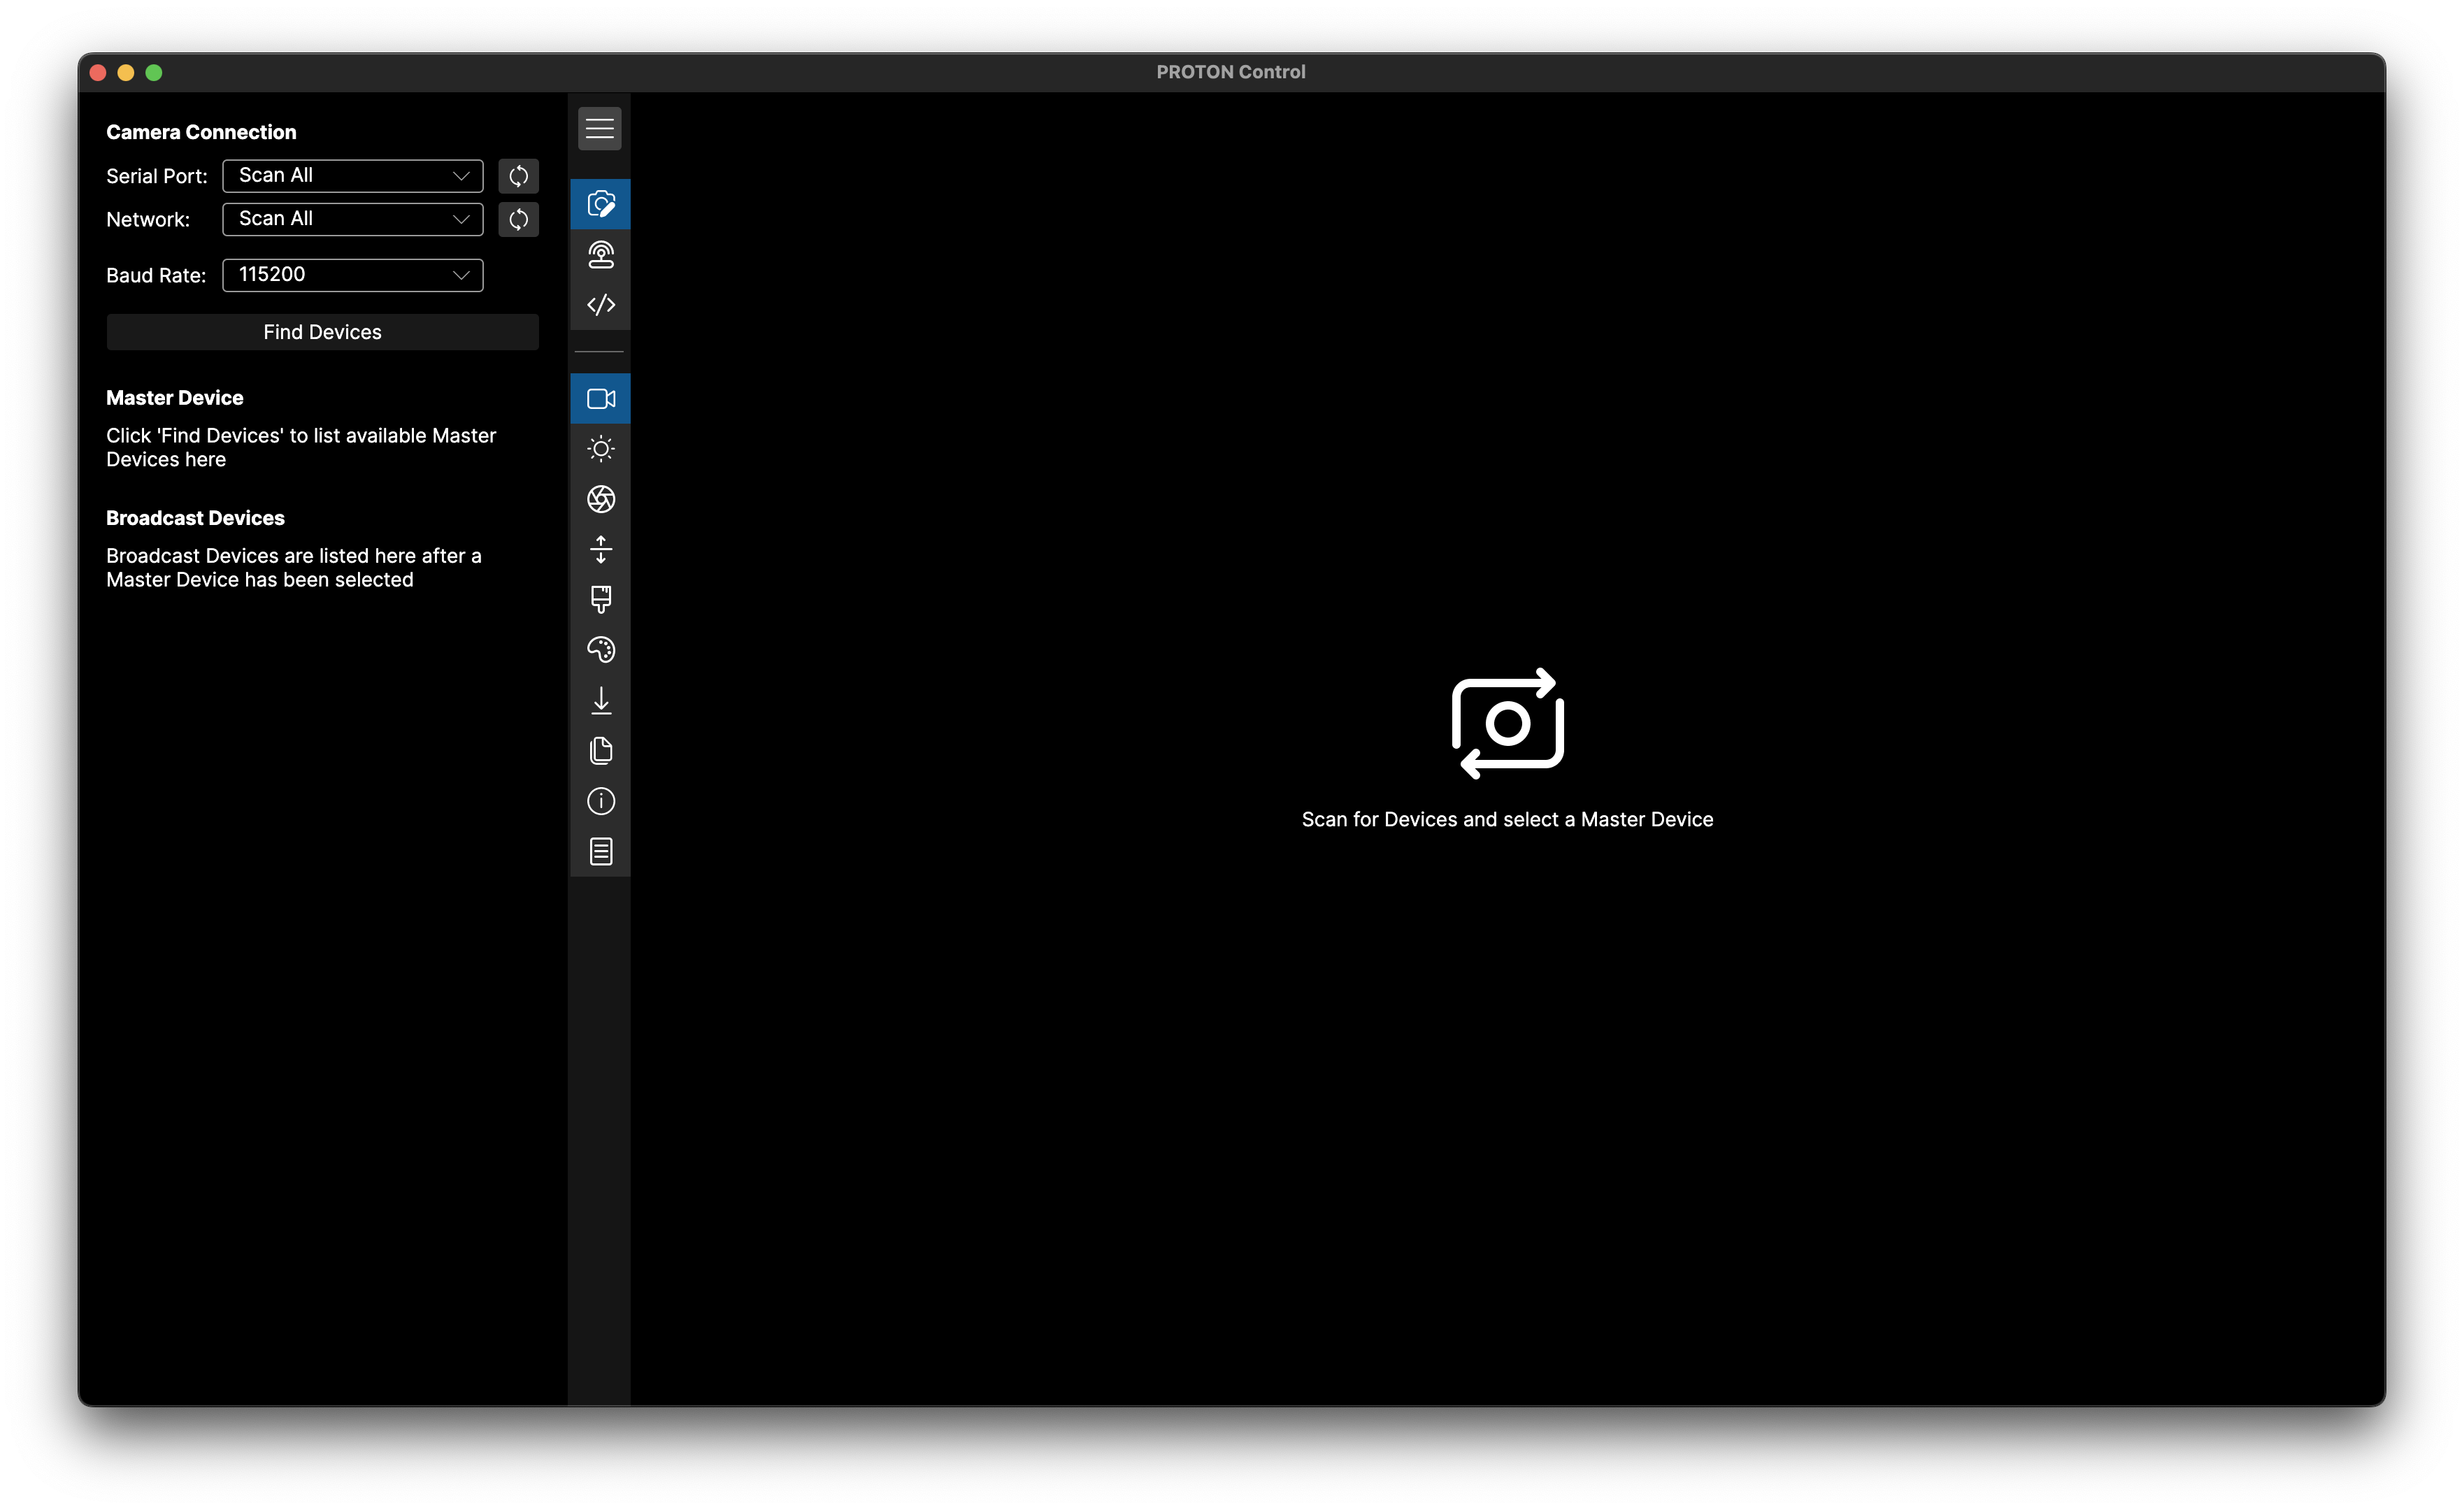
It will scan your computer for PIO (USB) and your network to find PIO-E (Ethernet or WiFi).
And if you click on it, you'll be able to control it as any other proton camera.
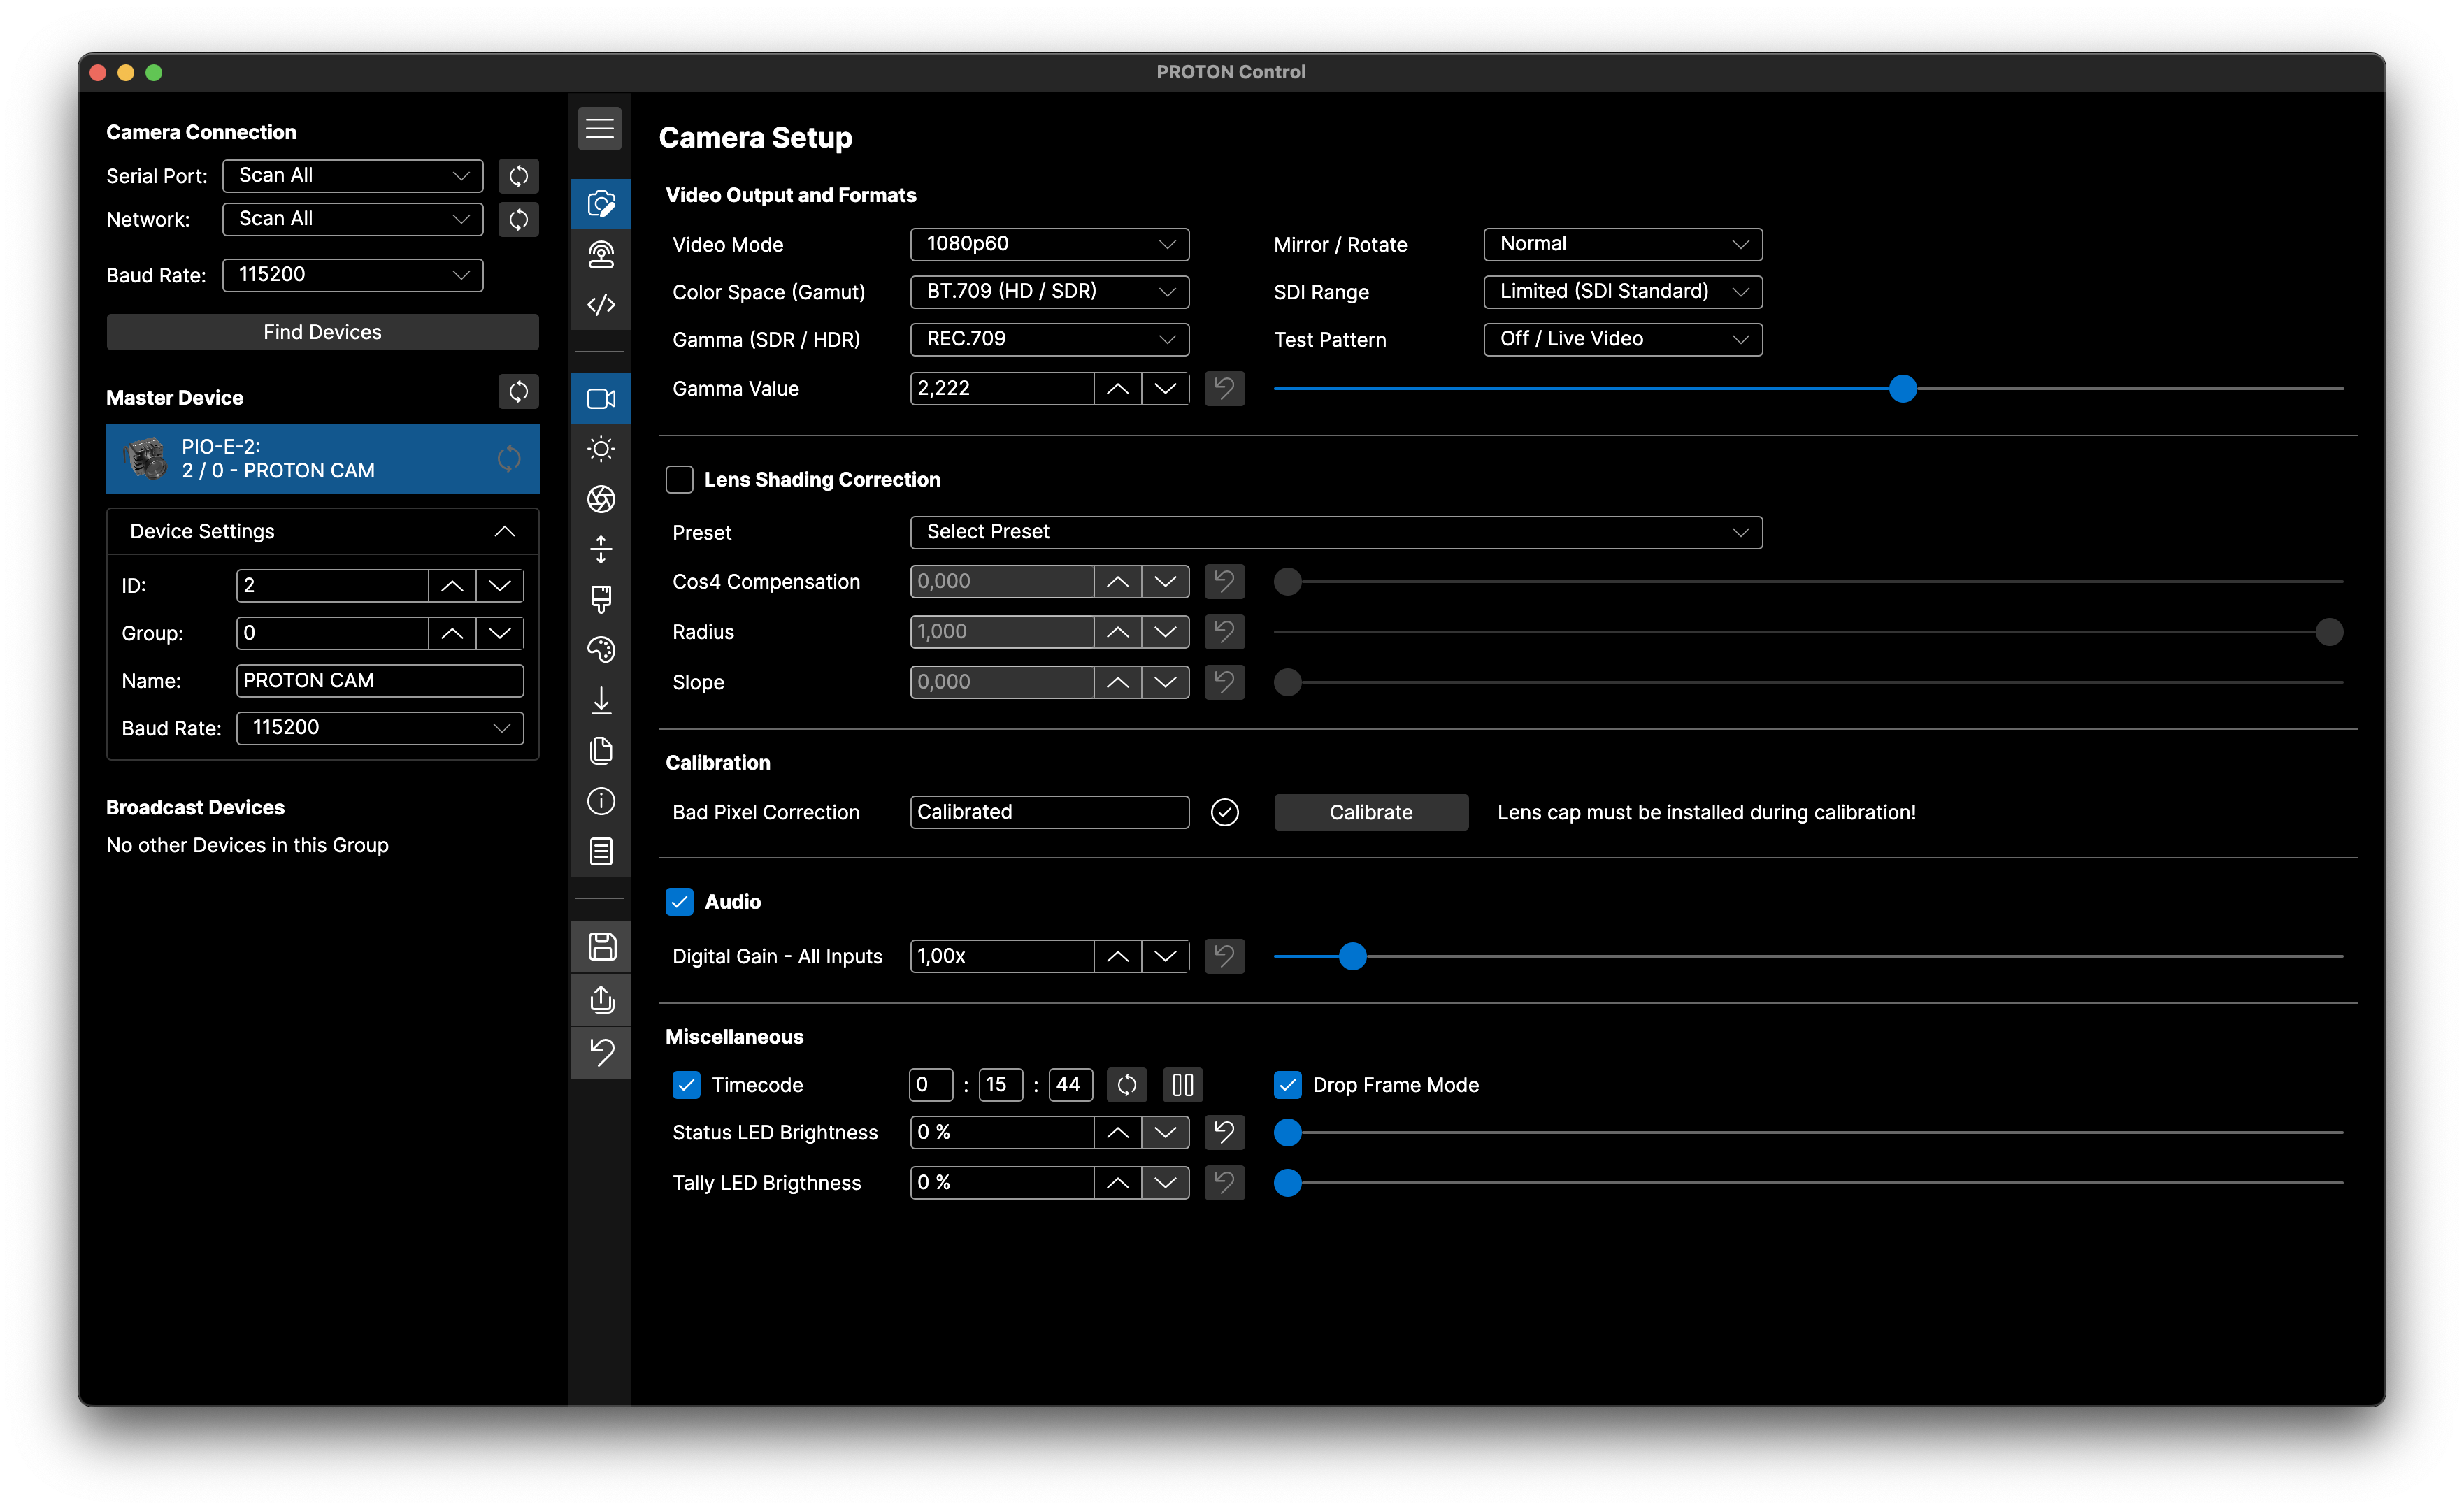
Here it automatically finds my camera, it tells me:
- it's connected to my PIO named
PIO-E-2 - my camera ID is
2 - my camera GROUP is
0 - it's a
PROTON CAM
And if you have multiple cameras on multiple PIO / PIO-E, you'll be able to switch from one camera to another by simply clicking on it.
Allowing you to control any number of camera.
Static IP
By default, the PIO-E is in DHCP.
You can change that:
- Using Ethernet:
- If your PIO-E and computer are both in DHCP and on same network
- If your PIO-E and computer are both in STATIC and on same network
- Using USB-C between your computer and PIO-E
Go on the PIO section using the Proton Control Software and click on your PIO-E:

You can then uncheck DHCP and enter a valid STATIC IP:
- IP
- Gateway
- Mask
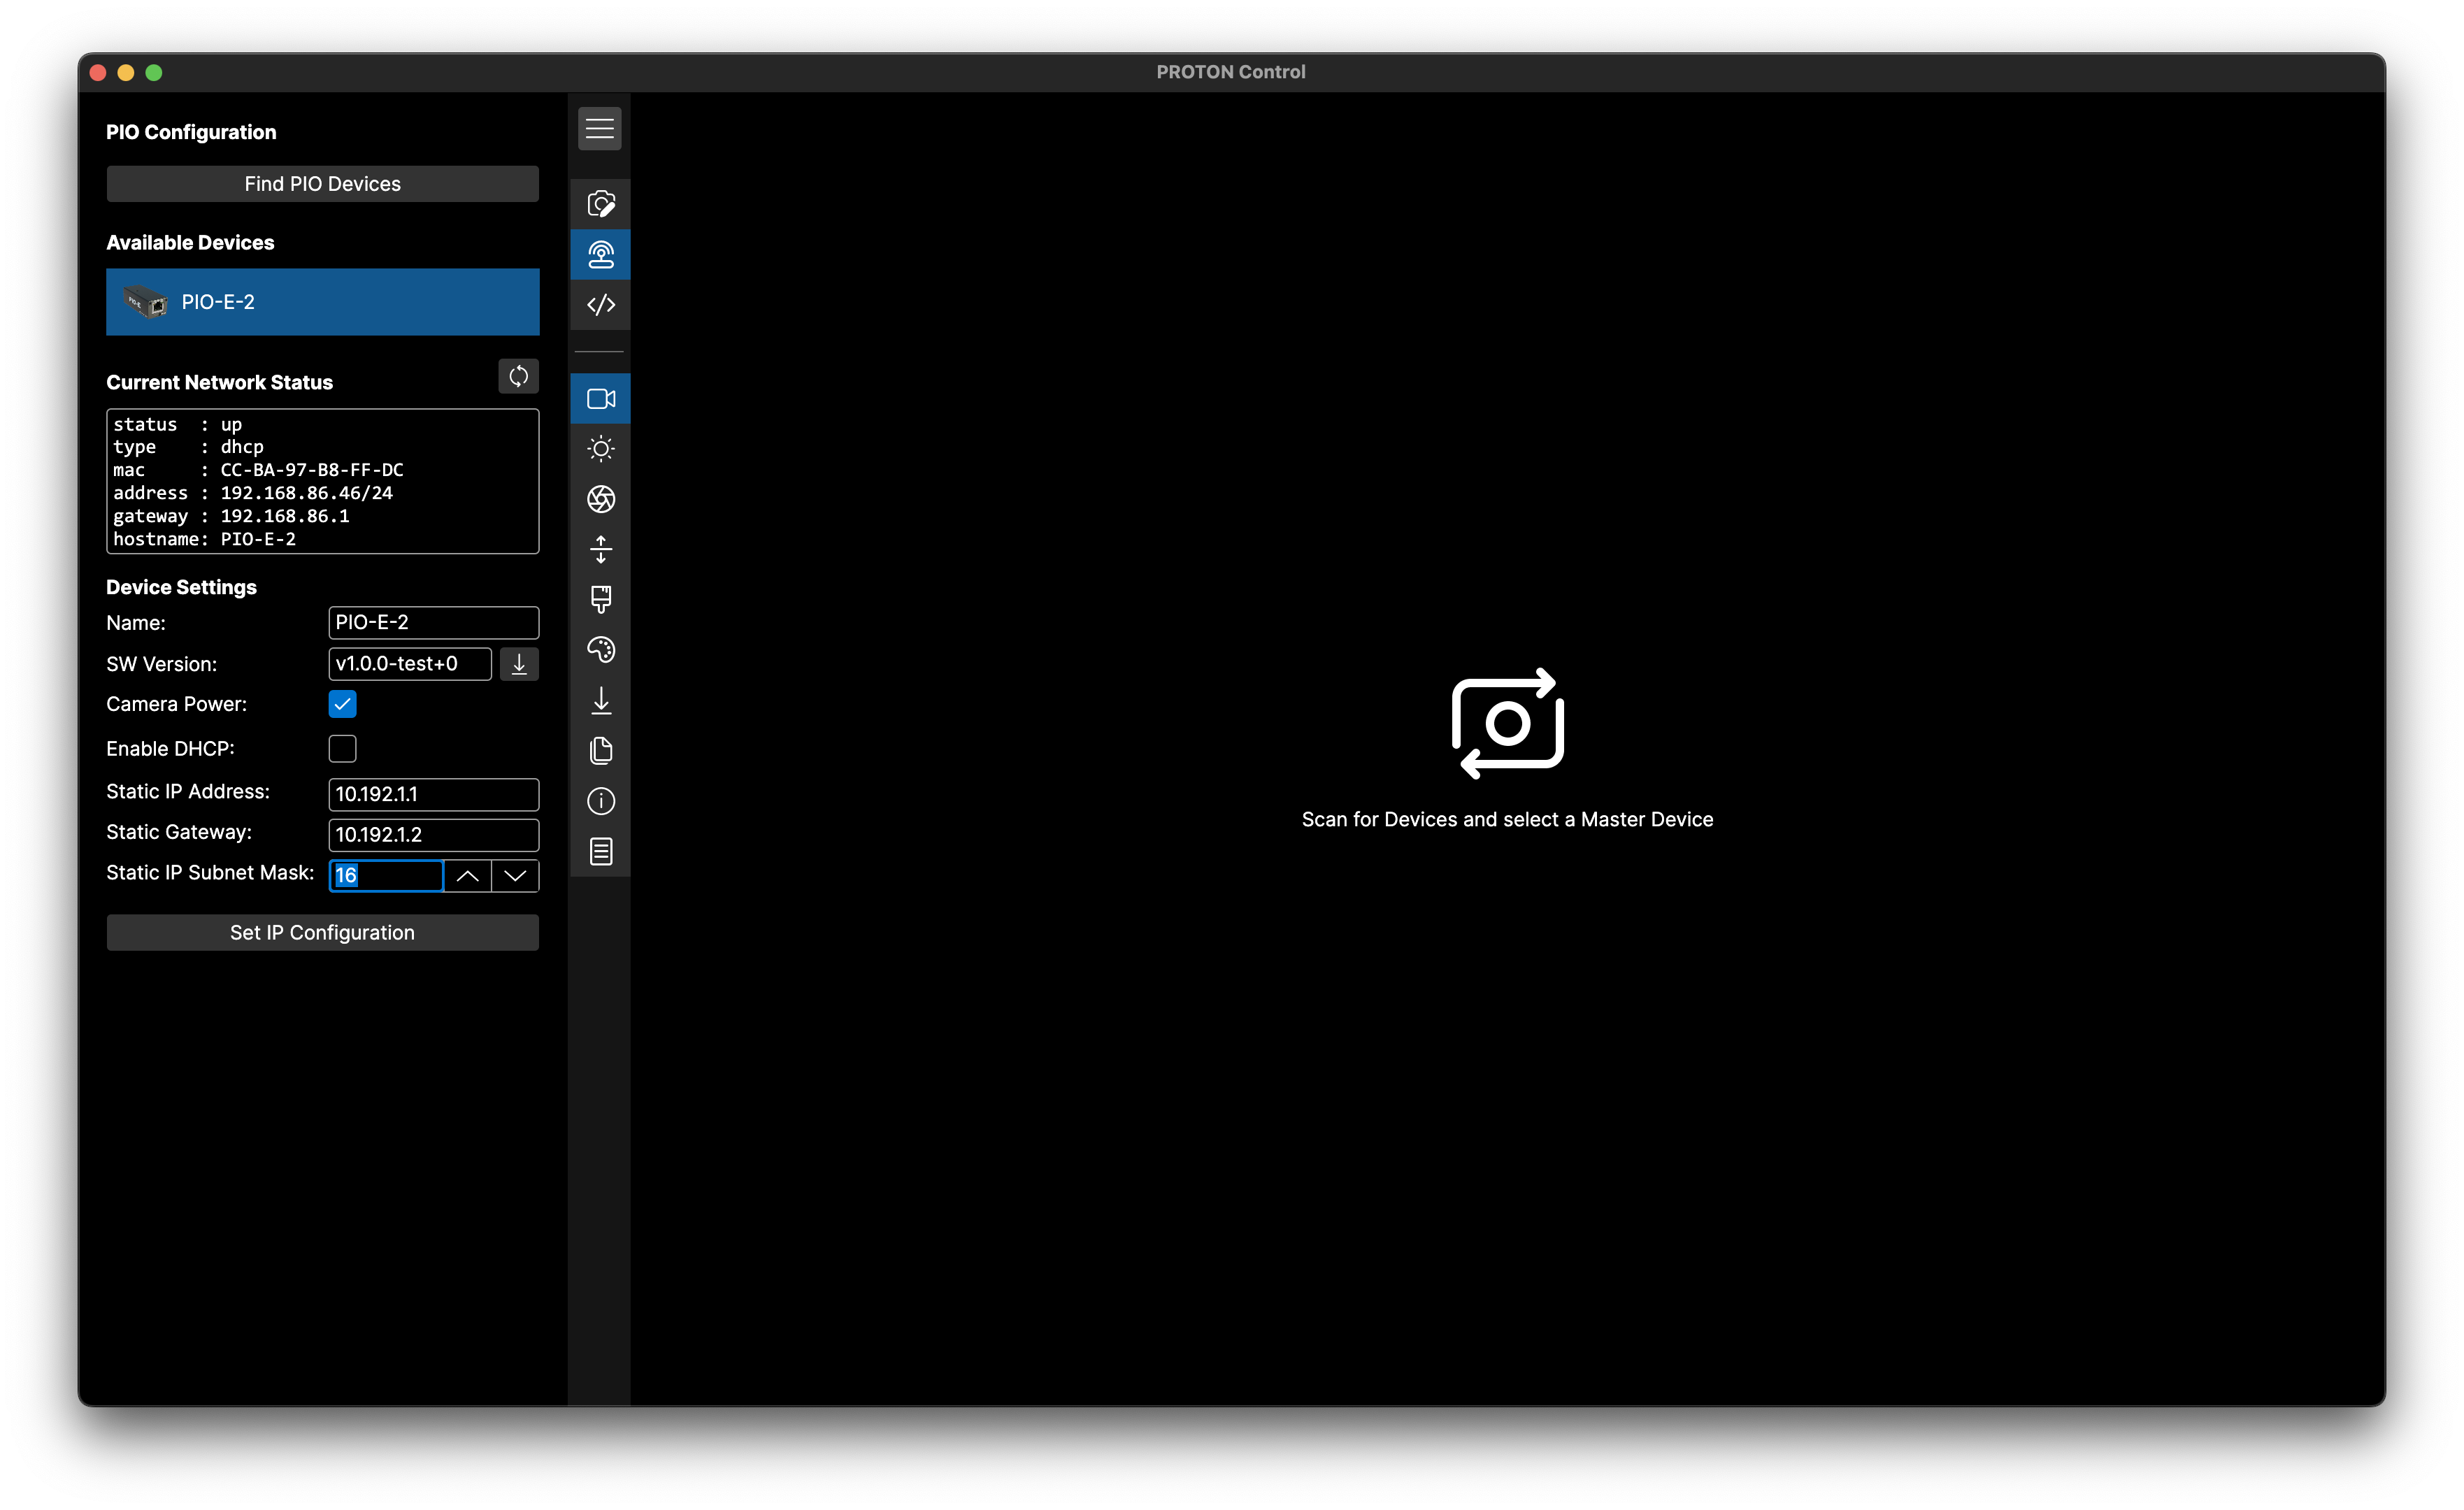
Then click on Set IP Configuration
After that, your PIO-E should appear with it's new IP configured:
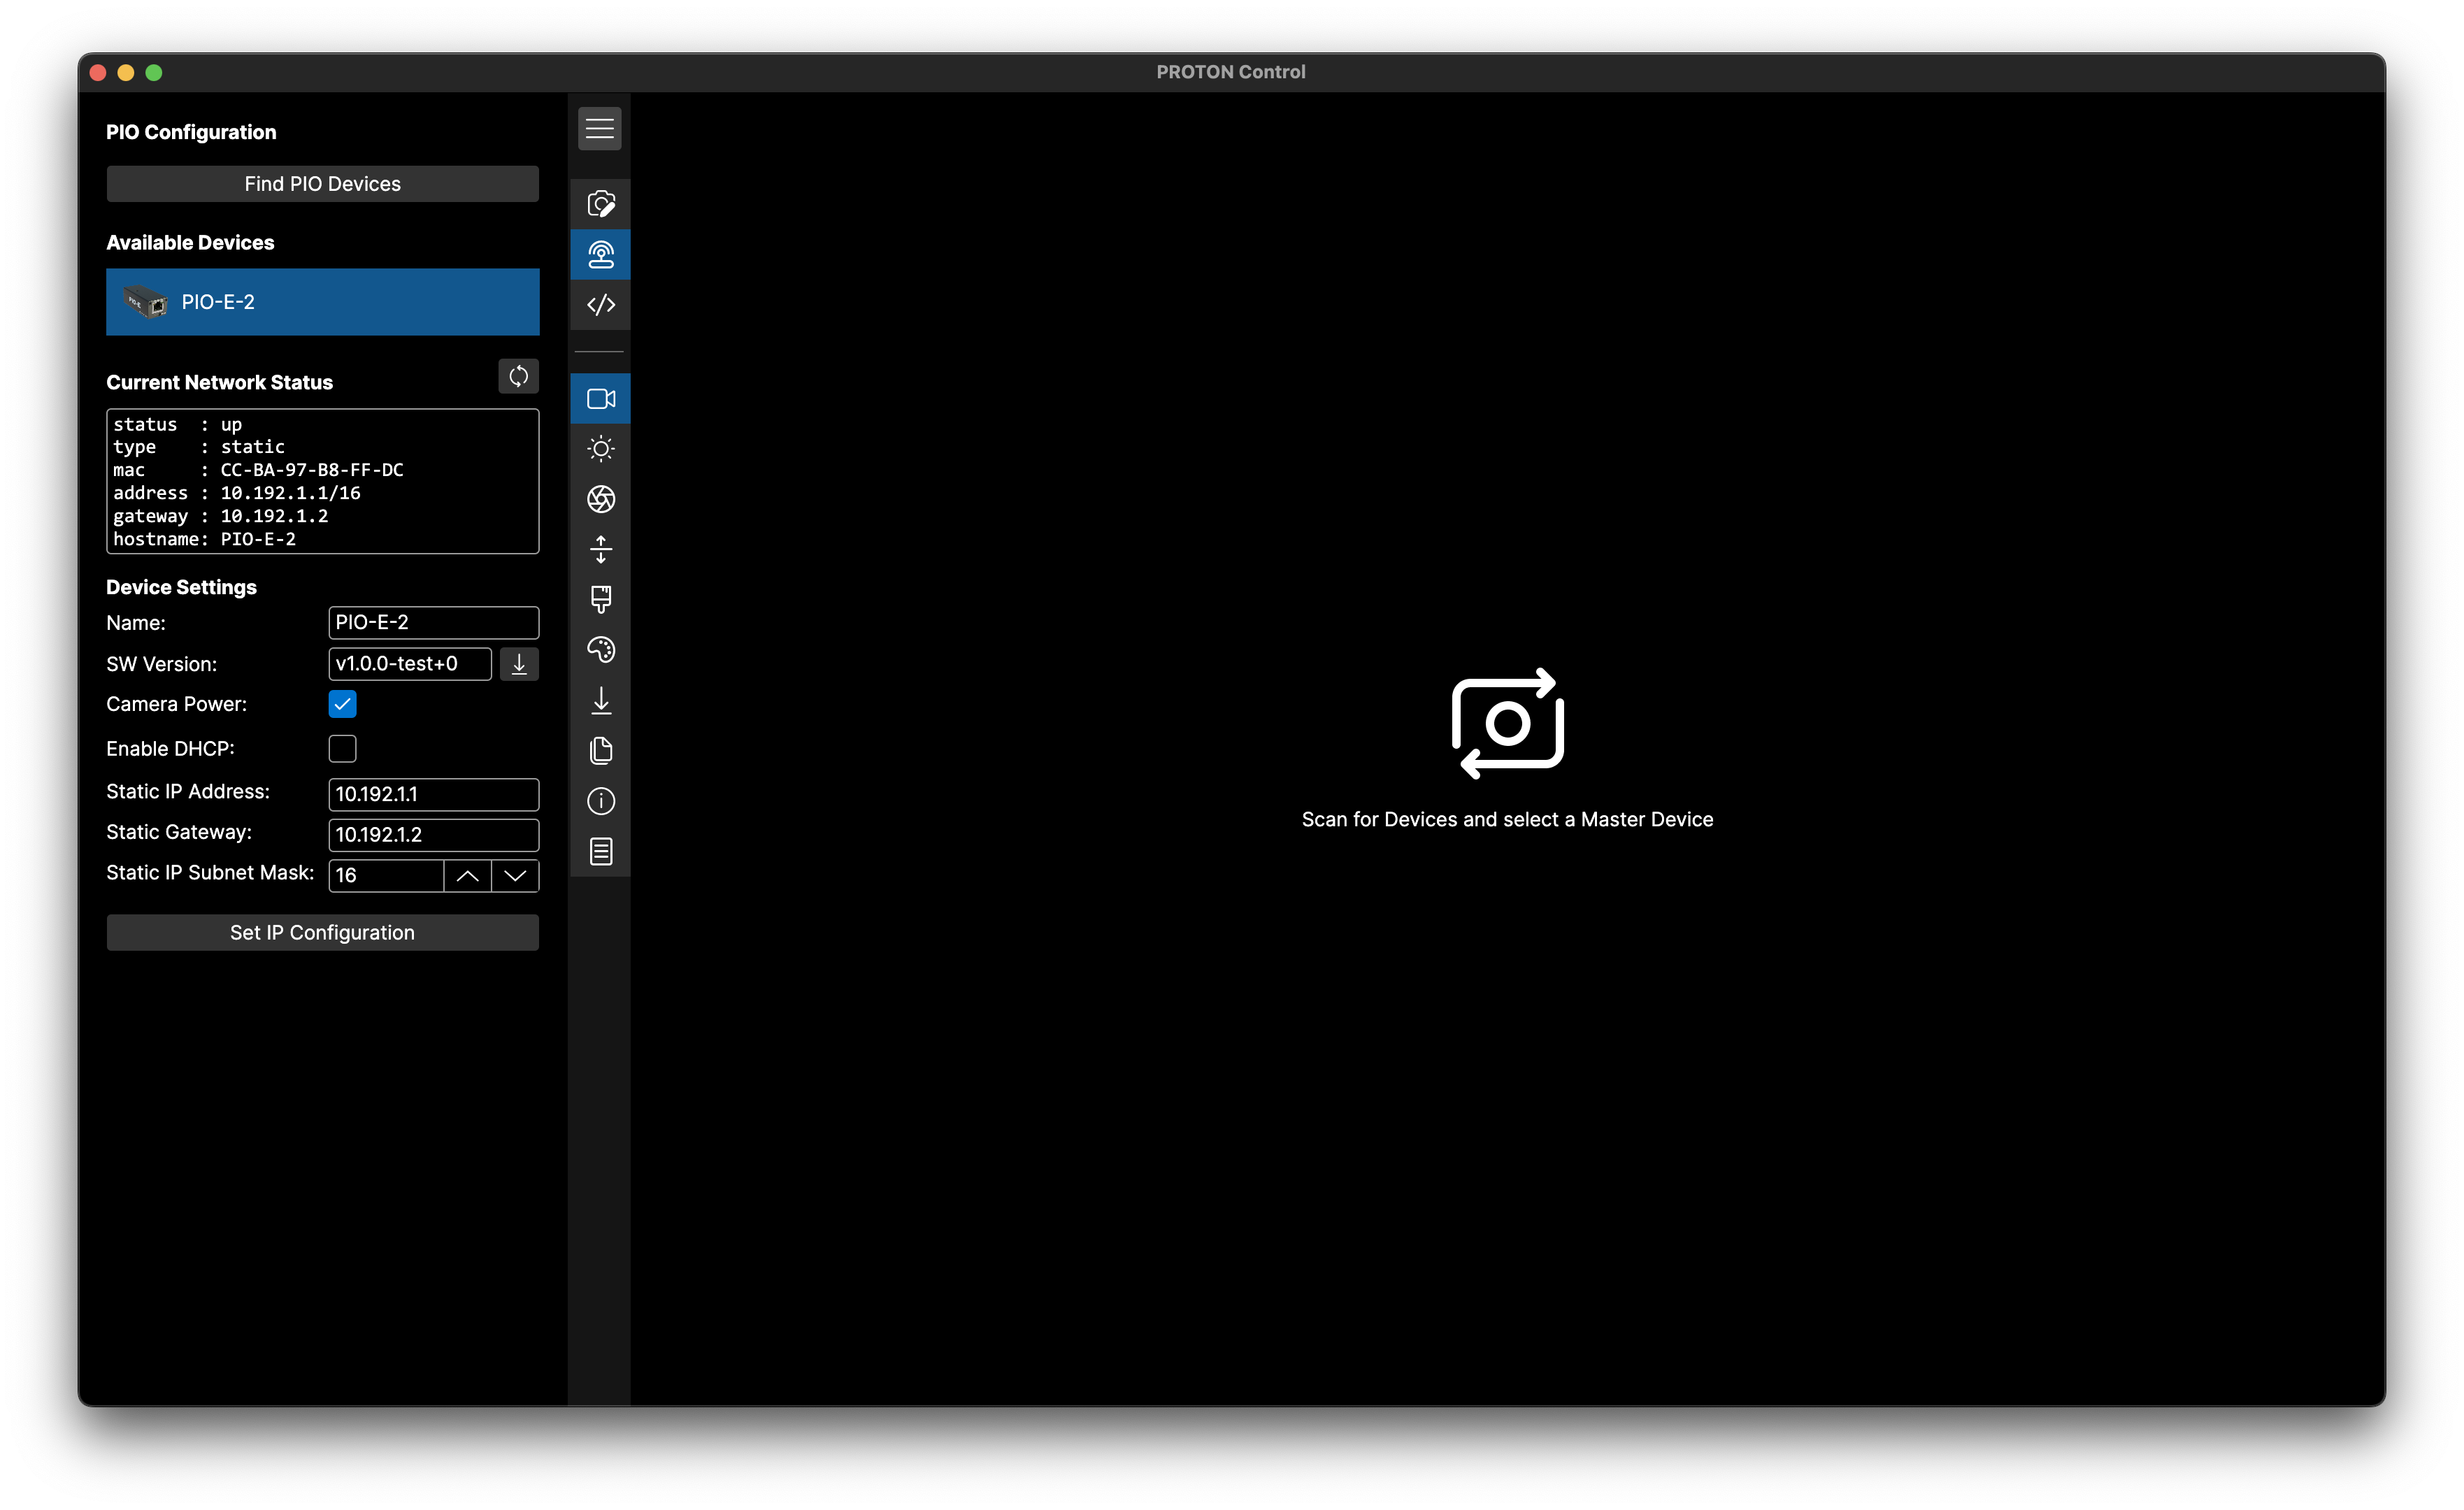
Pay attention that the LED color changed to PURPLE blinking when in STATIC. But still BLUE blinking when controlled (both in STATIC and DHCP, both from Software or RCP)
If you enter something invalid or don't remember, you can alway RESET it using the button or connect to your computer using USB-C
Troubleshooting
Not finding PIO-E or Camera
When you use the button Find Devices (in the camera section) or Find PIO Devices (in the PIO section), it will use broadcast messages and discovery.
Sometime theses messages are blocked by network, etc. (Router, Firewall, VPN, VLANs, etc.).
You still can add your cameras manually:
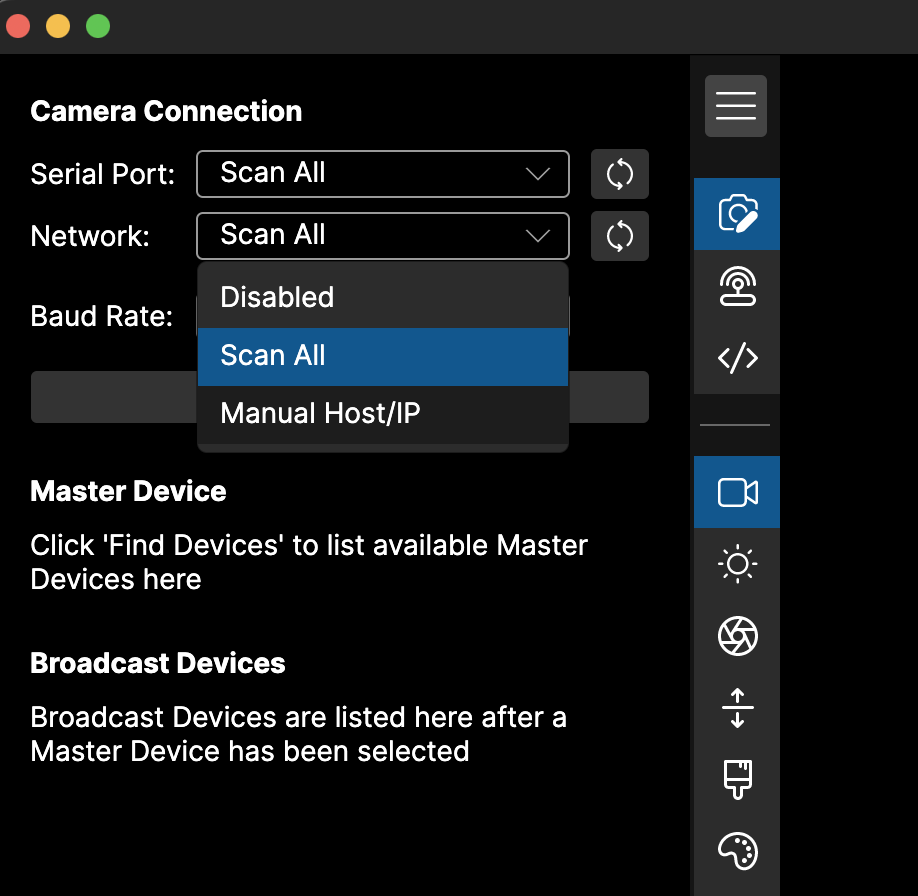
- Open your Proton Control Software
- On the main page, click on
Networkdrop down list - Select
Manual Host/IP
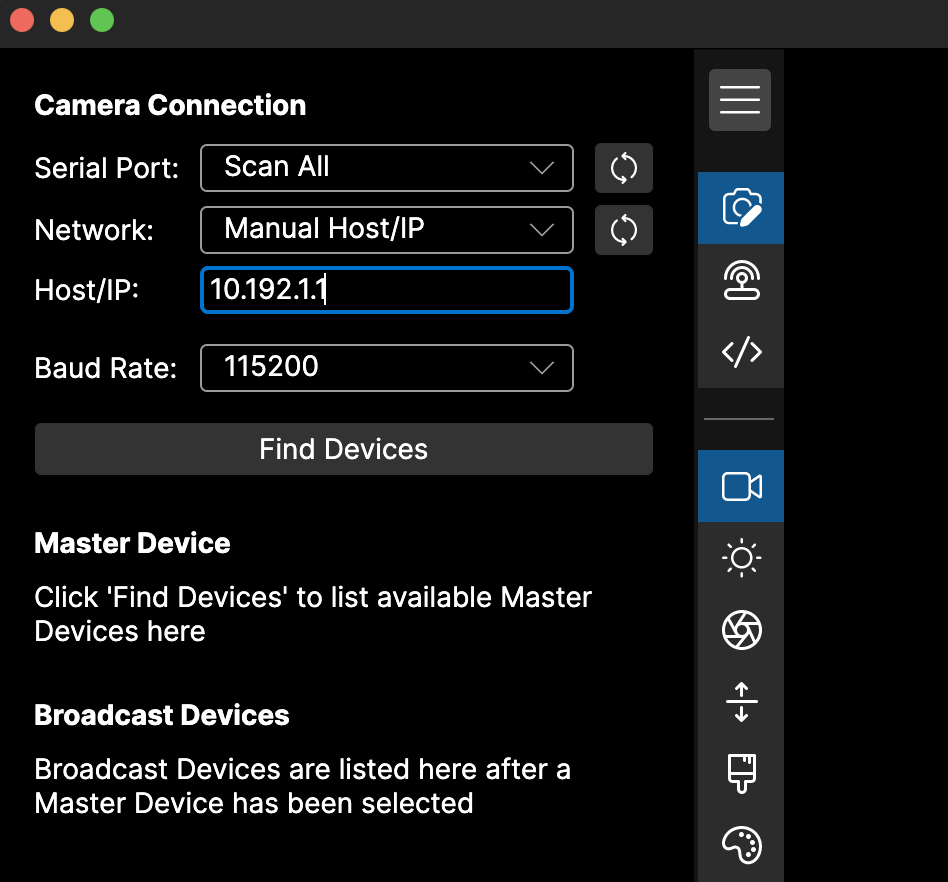
Then a new text input field appears:
- Enter your PIO-E IP
- Click
Find Devices
Plug your PIO-E using the USB-C (make sure your usb-c cable provides power + data, some only provides power). Your pio should now appear in the PIO section of the Proton Control Software. If you click on it, the PIO IP should appear.